
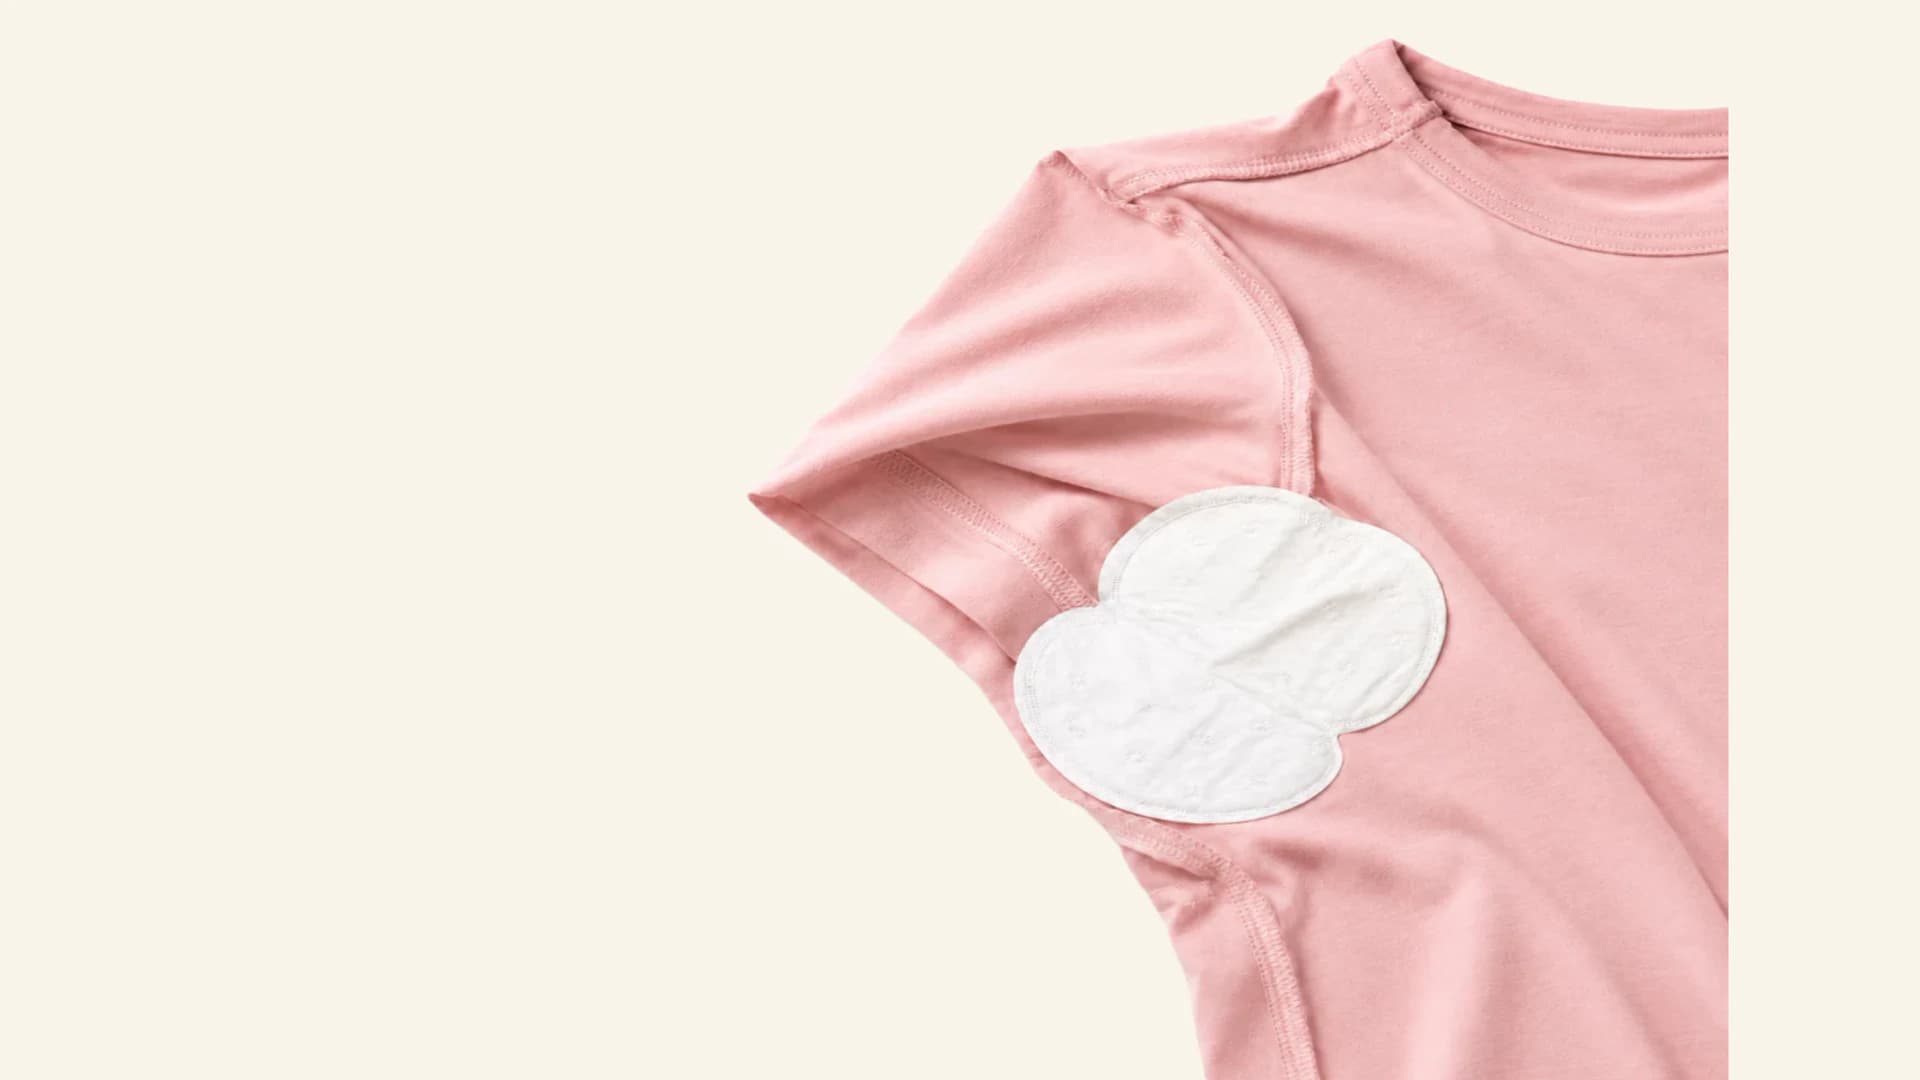
To compare pad types, garment compatibility, and product-selection criteria, visit the complete Sweat Pad Guide. This article stays focused on the application task. If you are still evaluating the product category, first review how to judge whether an underarm sweat pad is working.
Placement Guide
Where To Place Underarm Sweat Pads In A Shirt
Clothing-adhesive armpit pads should sit inside the garment, with the absorbent area covering the fabric where moisture reaches the underarm. Use the underarm seam as a placement reference rather than a rigid center line: seam thickness, armhole shape, lining, stretch, and shirt fit determine where the adhesive can make smooth contact.
Practice with the exact shirt at home before relying on it for a commute, shift, trip, or event. Put on the complete outfit, raise and lower both arms, reach normally, and check comfort, edge lift, and outside visibility. A position that works in one shirt may need adjustment in another garment construction.
Start inside the garment
Turn the garment inside out and work with the fabric itself. SWEARX attaches to clothing only, never directly to skin.
Find the moisture contact area
Identify where underarm moisture normally reaches the shirt or other garment rather than relying on the seam alone.
Use the seam as a reference
Align the absorbent area with the underarm seam, then keep adhesive edges on smoother fabric when a thick seam would prevent flat contact.
Check both sides
Before dressing, confirm that both pads lie flat at a similar height; then wear the complete shirt and test normal arm movement.
Six-Step Sequence
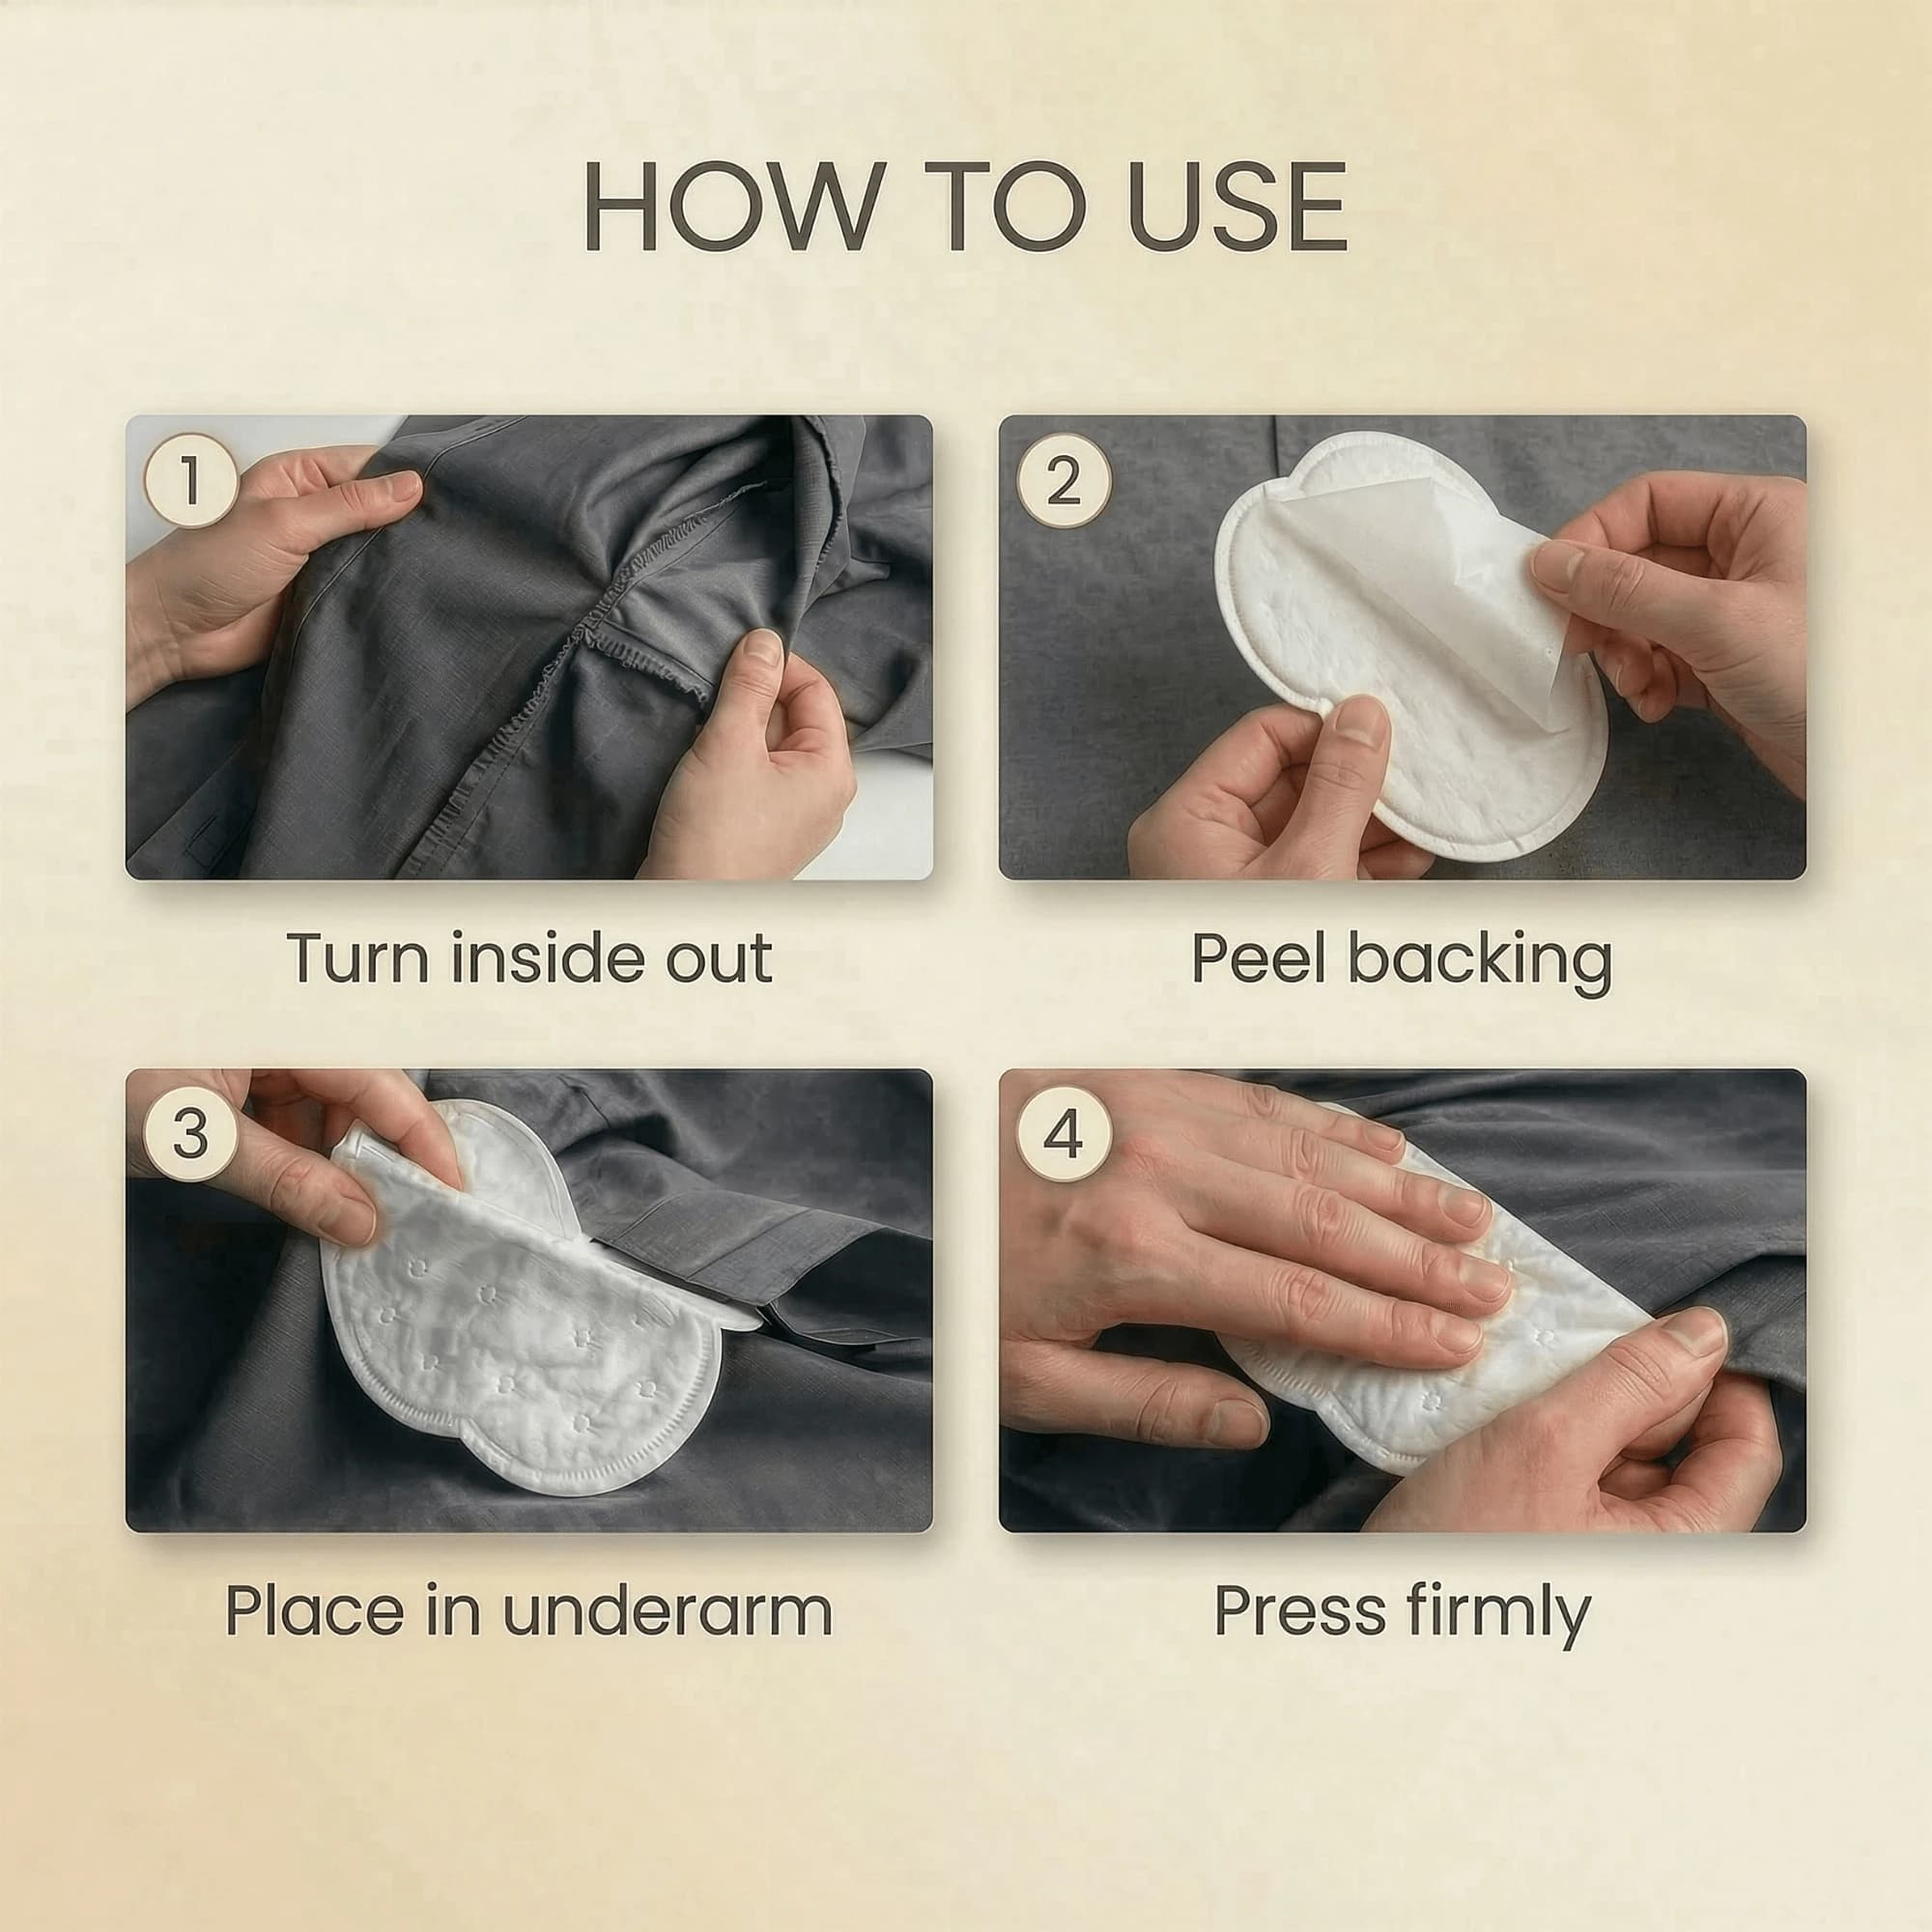
How To Apply Underarm Sweat Pads Step By Step
Follow the sequence from garment preparation through the final wear check. If placement is poor, remove the used pad and start again with a fresh one rather than repeatedly lifting and reattaching the same adhesive.
- 01
Turn the garment inside out
Open the shirt, blouse, or uniform so the inside underarm area is easy to reach and the fabric lies naturally.
- 02
Prepare clean, dry fabric
Remove lint or visible residue and let the fabric dry fully. Dampness, lotion, or loose fibers can reduce clothing-adhesive hold.
- 03
Peel away the backing
Hold the pad by its edges and remove the protective liner without touching the adhesive more than necessary.
- 04
Align the pad with the underarm area
Use the underarm seam as a reference, then position the absorbent area where moisture reaches the clothing.
- 05
Press and smooth the pad
Press across the center and every edge for several seconds so the pad lies flat against the garment.
- 06
Turn right side out and test
Put the garment on, raise and lower both arms, check comfort and visibility in a mirror, and correct poor placement before leaving home.
Garment Differences
Adjust Placement For The Actual Garment
The application sequence stays the same, but the smooth contact area changes with seams, stretch, lining, fabric weight, and underarm construction. Test the complete outfit, including a jacket or overshirt, before leaving home.
Dress Shirts
Center the pad across the smooth underarm panel and keep adhesive edges away from a thick armhole seam when possible.
T-Shirts
Let stretched fabric return to its natural shape before pressing, then test that the pad remains flat during arm movement.
Blouses
Use careful centered placement and inspect the outside for edges or an outline before relying on the garment.
Uniforms
Check seams, reinforcement, and the full work movement range before a shift.
Lightweight Fabrics
Use the smoothest available area and test visibility because thin, tight, delicate, or textured fabric can behave less predictably.
Troubleshooting
Why Sweat Pads Move Or Do Not Stick To Clothes
Sweat pads may not stick securely when fabric is not fully clean and dry, or when rough texture, stretch, treatments, or a thick seam interrupts adhesive contact. Poor alignment and insufficient smoothing can also leave an edge exposed to arm movement, allowing the pad to fold or shift.
To help keep a sweat pad from moving, let stretched fabric return to its natural shape, position a fresh pad on the smoothest suitable underarm area, and press from the center toward every edge. Repeat the complete-shirt movement check; these steps may improve hold on suitable fabric but cannot guarantee adhesion on every garment.
The problems below are independent checks, not numbered steps.
Pad does not stick
Likely cause: The fabric is damp, linty, rough, treated, heavily textured, or carrying residue.
Practical fix: Use a fresh pad on clean, fully dry fabric, choose a smoother suitable area, and press the complete adhesive surface.
Pad moves
Likely cause: Poor seam alignment, stretched fabric, loose edges, or repeated arm movement catches the pad.
Practical fix: Remove the used pad, let the fabric relax, and center and smooth a fresh pad before repeating the movement check.
Pad folds
Likely cause: The fabric bunches or stretches during application, or the center and edges were not smoothed fully.
Practical fix: Apply a fresh pad while the fabric is relaxed, then smooth outward from the center to help keep every edge flat.
Pad outline is visible
Likely cause: The garment is thin, tight, light-colored, or stretched over the pad.
Practical fix: Adjust the position or use a garment with more weight or underarm room.
Pad becomes saturated
Likely cause: Heat, activity, moisture level, and wear conditions have filled the absorbent area.
Practical fix: Remove it and apply a fresh pad to clean, dry clothing when continued protection is needed.
Final Wear Check
Check Comfort, Movement And Visibility
Put the garment on only after both pads are pressed flat. Move as you will during the day and inspect the outside in normal light. Very thin, tight, pale, delicate, or highly textured garments may show an outline or provide less predictable hold.
For a fuller check of fabric, fit, seams, sleeve openings, and the finished outfit, see the garment visibility guide.
- Both pads lie flat with every edge pressed down.
- Each absorbent area is centered where moisture reaches the garment.
- The garment feels comfortable when both arms rise, reach, and return to rest.
- A front, side, and arms-up mirror check shows no distracting outline.
- Fresh individually wrapped replacements are packed when heat, activity, travel, or a long day may require them.
During Wear
Replace A Pad When Its Condition Changes
There is no fixed wear-duration promise. Heat, activity, garment, placement, and moisture level all affect when a pad needs changing. Use a fresh pad when any of these practical triggers appears:
- The absorbent area feels saturated or no longer provides the clothing protection needed.
- An adhesive edge is loose, folded, or repeatedly catches during movement.
- The pad has shifted away from the intended underarm position.
- The pad feels uncomfortable or becomes more visible through the garment.
During an on-the-go change, keep the fresh pad and its backing clean and dry until use. Remove the used pad before applying the replacement to the garment.
After Wear
Remove And Discard The Used Pad Safely
Peel slowly
Lift one edge and peel the used pad back gradually from the fabric.
Avoid sharp pulling
Do not yank the pad away from the garment in one fast motion.
Protect delicate fabrics
Use extra care with delicate, textured, or specialty fabric and follow the garment's care guidance.
Discard after use
Dispose of the single-use pad and its replacement backing; do not try to reattach a used pad.
Buyer questions
Frequently Asked Questions
Turn the garment inside out and place the pad over the inside fabric area where underarm moisture normally reaches it. Use the seam as a reference, but keep adhesive edges on the smoothest practical fabric rather than forcing them over a thick seam.